
There’s something magical about baking your own bread at home. The smell of fresh sourdough wafting through your kitchen, the satisfying crackle of the crust as you slice through it, and the soft, airy interior make every step worth it. If you’ve been intimidated by sourdough baking, this beginner-friendly recipe for a Rustic Sourdough Boule is the perfect place to start. With simple ingredients and flexible proofing options, you’ll be on your way to enjoying homemade sourdough bread in no time.
Ingredients You’ll Need
This recipe keeps it simple with just four ingredients:
- 460g all-purpose flour: I use unbleached all purpose flour (Golden Powder). However, any all-purpose flour you have on hand will work beautifully.
- 340g water: This is your starting amount. You’ll reserve 50g to incorporate later, depending on how your dough feels.
- 9g sea salt: For flavor and dough structure.
- 92g ripe sourdough starter: Make sure your starter is bubbly and active. If you’re new to sourdough, check out my guide on maintaining a starter.
Step-by-Step Instructions
Step 1: Mix the Dough
In a large mixing bowl, combine the flour, most of the water, salt, and sourdough starter. Hold back about 50g of water for later. First use a dough Hook and than with wet hands, mix everything together until the ingredients form a shaggy dough. Then, spend a few minutes kneading by hand, pinching and folding the dough until it feels smooth and cohesive. If the dough seems stiff and can handle it, gradually incorporate the reserved water. The goal is a dough that’s slightly sticky but holds its shape.
Step 2: Bulk Fermentation 3.5 hrs
Once mixed, it’s time for the dough to rest and rise. During this phase, you’ll give it a five sets of stretch and folds to build strength and structure. To perform a stretch and fold, gently stretch one side of the dough and fold it over itself, rotating the bowl as you go. Repeat this process periodically throughout the bulk fermentation period. The dough will transform, becoming smoother and more elastic. I like to place mine between the stretching above my fridge in the cabinet as it is the warmest spot in my kitchen.
Step 3: Preshape 20 min
When the dough has risen and feels light and airy, transfer it to a lightly floured surface. Using a bench scraper, shape the dough into a loose round. Let it rest uncovered for a 20min. This preshaping step relaxes the gluten and prepares the dough for its final shaping.
Step 4: Shape and Proof
After resting, shape the dough into a boule (round) or batard (oval). Place the shaped dough into a proofing basket lined with a floured kitchen towel. Cover it completely to prevent drying out. Let it proof at room temperature or place it in the refrigerator to proof overnight. Both methods yield excellent results, so choose what works best for your schedule.
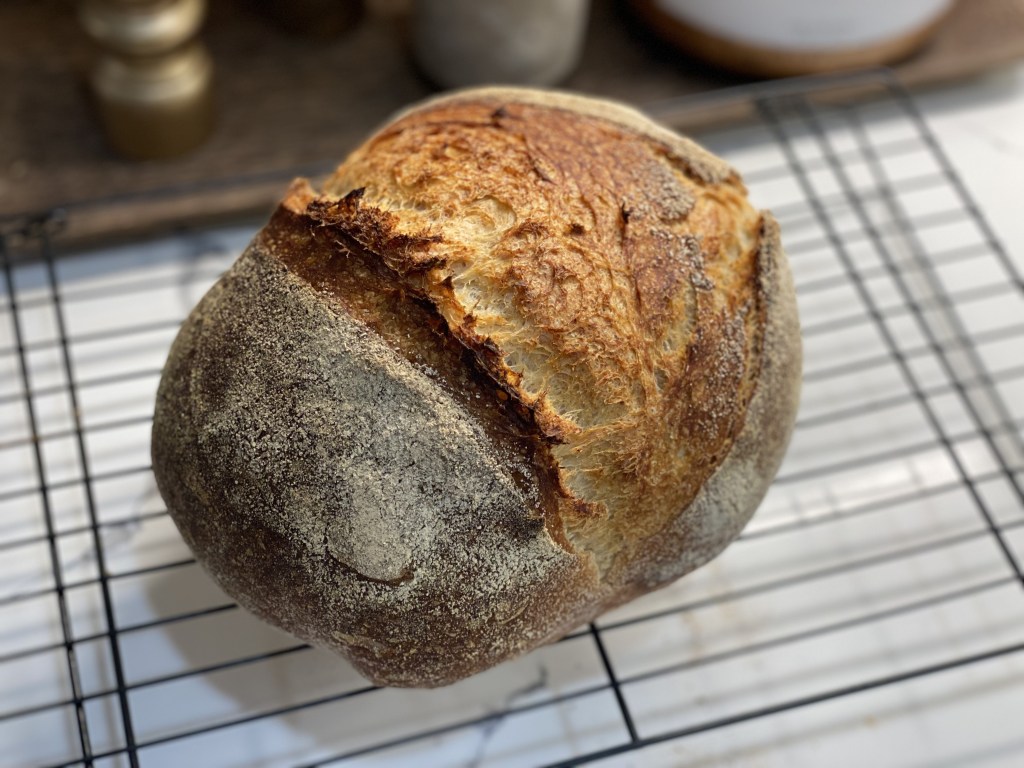
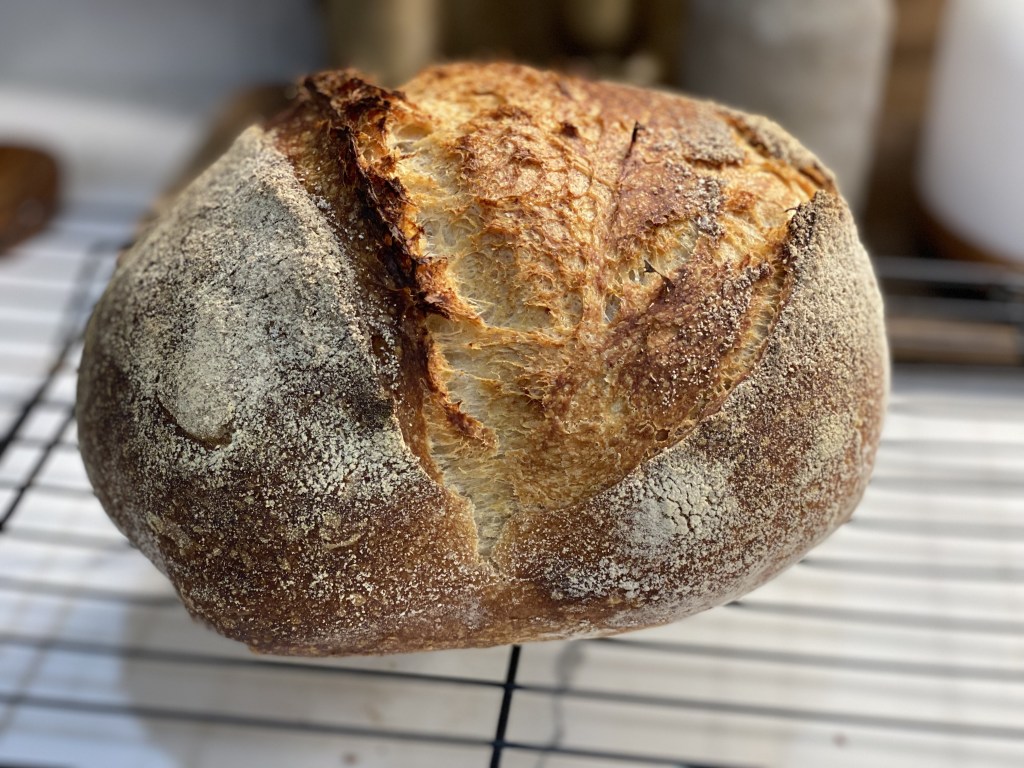
Step 5: Bake
Preheat your oven to 450°F with a baking surface or Dutch oven inside. Once preheated, carefully transfer the dough to the baking surface and score the top with a sharp knife or razor blade. This allows the bread to expand during baking. Bake with steam or a lid for the first portion of the baking time, then finish uncovered to develop a golden, crispy crust. The bread is done when the internal temperature reaches around 204°F.
Tips for Success
- Hydration Levels: If you’re new to sourdough, handling higher hydration doughs can be tricky. Feel free to hold back some of the water if the dough feels too wet.
- Scoring: Don’t skip scoring! It helps control how the bread expands in the oven.
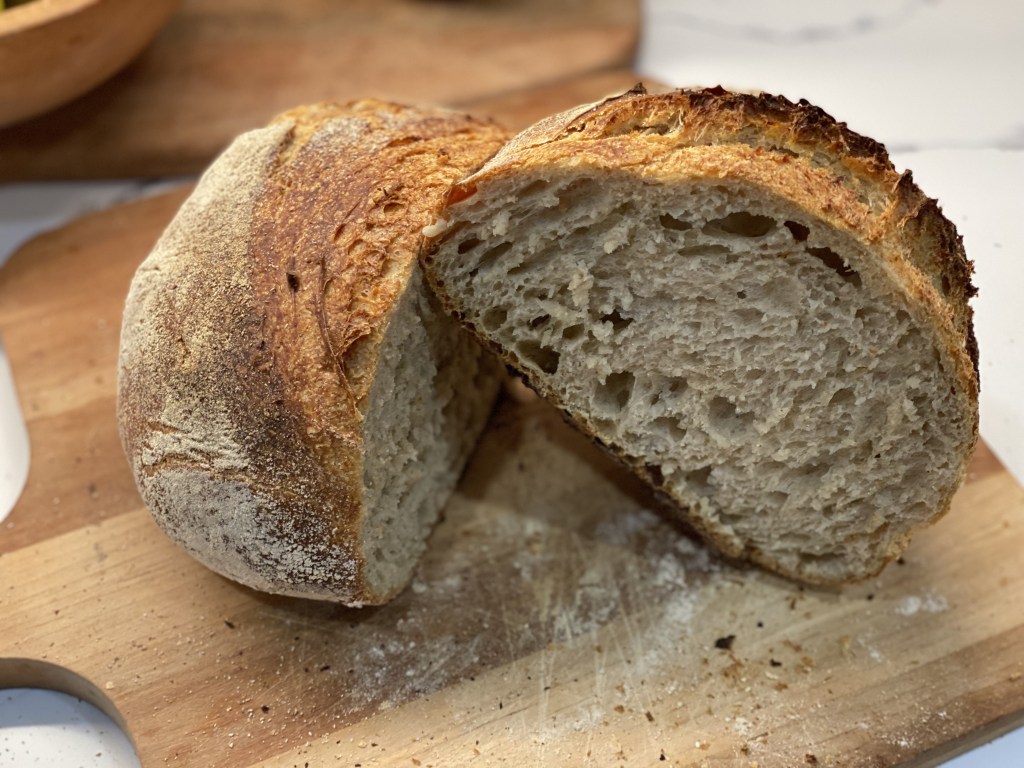
- Cooling: Allow your boule to cool completely on a wire rack before slicing. This ensures the crumb sets properly and doesn’t become gummy.
Why This Recipe Works
This Rustic Sourdough Boule recipe is designed for flexibility and ease. By using all-purpose flour, it’s accessible for beginner bakers who may not have specialty flours on hand. The option to proof overnight allows you to fit baking into your schedule, whether you want fresh bread for dinner or lunch the next day.
Final Thoughts
Baking sourdough bread is as much about the journey as it is about the result. This recipe is the perfect starting point to build your skills and confidence. Once you master the basics, the possibilities are endless—from experimenting with different flours to trying unique shaping techniques. So, roll up your sleeves, preheat that oven, and enjoy the simple pleasure of homemade sourdough bread. Happy baking!
You can watch my full recipe video here:
If you would like to see my bread making supplies you can check them out here: https://liketk.it/52lRf

Leave a comment